How to Use a Sewing Machine Needle Threader

Hey there, if you’re new to sewing, you’re probably wondering how to work that sewing machine needle threader, right? Well, let me tell you, knowing how to use a sewing machine needle threader is one of the first things you gotta learn for any sewing project.
I mean, you can’t just start sewing without threading that needle! And let me tell you, threading that needle can be a real pain in the you-know-what. It’s one of those annoying and challenging steps we all have to go through, even with fancy sewing machines. Trust me, we’ve all had our fair share of failed attempts at threading that pesky needle.
But don’t worry, I’ve got your back! I’ve put together a super detailed guide on how to use a needle threader on a sewing machine. It’s like an intricate little map to make your life a whole lot easier. We’ll cover not one, but two different ways to tackle this needle threading process. So sit tight and get ready to conquer that needle like a pro!
Table of Contents
- 1 What is a Sewing Machine Needle Threader?
- 2 What Is an Automatic Sewing Machine Needle Threader?
- 3 Preparing the Sewing Machine for the Needle Threader
- 4 Preparing the Thread Ends For the Needle Threader
- 5 Methods to Use a Needle Threader On a Sewing Machine
- 6 Tips for Using a Needle Threader on a Sewing Machine
- 7 Frequently Asked Questions
- 8 Endnotes
What is a Sewing Machine Needle Threader?
The needle threader is an indispensable part of the sewing kit. This small tool allows the person to thread the needle. To use the threader, you have to pull the thread through the needle’s eye.
They also come with a cap or a cover to protect the threader’s wire. There are many types of needle threaders. You can find metal needle threaders, automatic needle threaders, plastic needle threaders, etc.
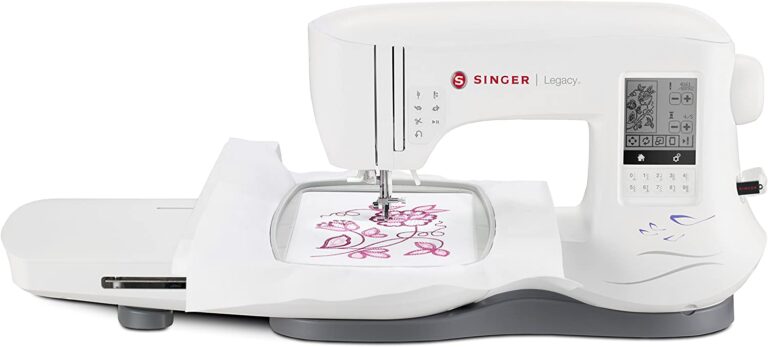
What Is an Automatic Sewing Machine Needle Threader?
These days, many modern sewing machines come with an automatic needle threader. These machines have unique features that automatically thread the needle for the sewist.
Automatic needle threaders are a lever that guides the thread through the sewing needle’s eye. It means that sewists no longer have to strain themselves to thread the needles. Automatic needle threaders eliminate the pain out of the process.
Though many sewists prefer doing it by hand, this automatic tool is a great option. You’ll find the automatic needle threaders on the upper left side of the needle on your machine. You can also check up on your manual to understand more about the automatic needle threader.
You have to change the automatic needle threader every time you start a new project or use a different thread.
Preparing the Sewing Machine for the Needle Threader
Whether you are a beginner or a professional sewist, you have to prep up your machine before the process. Prepping the device allows the threading process to go smoothly. Here’s how you need to prepare your sewing machine to use a needle threader:
Needle Up
It is ideal for threading your sewing machine with the needle in the upward position. On an advanced sewing unit, press the needle up switch. On manual sewing units, press the foot pedal or use the handwheel to move the needle.
In case you are working with an automatic need threading machine, it will only move upwards.
Presser Foot Down
Another step towards prepping your machine is to remove or lower the presser foot. However, this is an optional step. If you have a problem getting your fingers to the needle’s eye, allow yourself more space to work.
You can lower the presser foot or remove it altogether. Removing the presser foot will enable you to work freely.
In most machines, you have to remove your foot or press a lever to remove the presser foot. If you cannot do it this way, we recommend you refer to the sewing machine manual.
Machine Off
If you are a beginner, you should carry out the threading with the machine off. Turn the device off while you’re trying to thread the needle. Doing this will turn off the workspace light.
Besides, with the machine on, there’s a high chance of getting injured.
However, an accidental touch, or a pet, or your children could fiddle with the sewing unit. As a result, it could lead to a bad scenario. If you need more illumination, use an auxiliary light source.
Once you get the hang of needle threading, you’ll be able to do with the sewing machine turned on.
White Background
If you are having difficulties seeing the eye, you could try holding a white printer paper behind the needle. This trick will highlight the needle. It gives a better contrast between the background and the dark needle.
So, if you have poor vision, this trick will be of enormous help.
Preparing the Thread Ends For the Needle Threader
Now that you are done with prepping your machine, you also have to prepare the thread. We all know the struggles of passing a fuzzy or frayed thread through the needle’s eye. Those individuals fibers never pass through the thread at the same time.
If you want to thread the needle on a sewing machine, try and make the thread slick. You can do a few things to make the thread malleable and robust.
Cut the Frayed Ends
The first thing to do is to cut off the frayed ends. Make sure a pair of sharp scissors for this process. Dull and regular household scissors could make things worse for your thread. Also, it’s better to make angled cuts for easier threading.
Strengthen the Sewing Thread
This tip is essential for enhancing the strength of the thread. Most people lick the thread to strengthen and smoothen it out. How much ever gross it sounds, but it works! Use your fingers to give the thread ends a squish to compress its fibers.
You can also use water to do this. When you are not in a hurry, you can also use a thread conditioner. The thread conditioner is a fantastic trick for limp threads. Alternatively, you can also strengthen the thread by coating it with wax.
Strong threads will easily pass through the needle eye and also make long-lasting stitches.
Methods to Use a Needle Threader On a Sewing Machine
Today, we’ve listed two different methods by which you can use a needle threader on a sewing machine. The supplies you are going to need are:
- Sewing machine
- Thread
- Needle
- Needle threader.
This section also lists the pros and cons of each method.
Method 1: Using the Typical Needle Threader
Method one uses a traditional needle threader on a sewing machine. There are a variety of needle threader tools available. You can use any one of them for this method. The process essentially involves eight unskippable steps. Take a look:
Step 1
The first step involves holding the threader tool in one hand and the thread in the other. Make sure you have your sewing kit, needle, and everything in front of you. You also have to cut the appropriate length of thread for the process.
Step 2
Next, grab the threader handle between your forefinger and the thumb of the dominant hand.
Step 3
In step three, you have to pass the wire loop through the needle eyes. The aim here is to bring the threader body in proximity to the needle.
Step 4
Hold the thread from the spool with the other hand. Then, insert the thread through the loop.
Step 5
In step five, you have to pull the sewing thread through the threader loop. Doing this will offer you a part of the wire to hold.
Step 6
Next, fold the thread and grab both ends of the thread.
Step 7
Hold the wire and thread in one hand and use the other hand to pull the threader handle.
Step 8
Once you have the wire loop out of the needle, you can pull the thread from the wire.
Pros
- Typical needle threaders are readily available.
- This method is easy to learn and perform.
Cons
- It is more time-consuming than an automatic needle threader.
- It is a lengthy process.
The Bottom Line
Using a typical needle threader might be more daunting than using an automatic needle threader. However, most professionals prefer this way. It is because it offers them more control and convenience.
Method 2: Using Automatic Machine Threader
In this method, we’ll explain to you how to use an automatic needle threader. Since this is an automatic threader, you don’t have to do much. Check out these four steps:
Step 1: Raise the Needle
In the first step, you have to raise the needle in its highest position. You can do this by rotating the unit’s pulley orchard wheel. Besides, you also have to lower the presser foot. Lowering the presser foot is essential to make the automatic threader work.
Step 2: Hook the Thread
The next step involves hooking the thread. You’ll see that besides the needle, there will be a thread guide. You have to hook the sewing thread under that thread guide.
Step 3: Pull the Thread
In step three, you have to pull the threader guide downwards. Next, pass the sewing thread through the hook. The hook will be positioned on the opposite side of the needle’s eye.
Step 4: Release the Thread
The final step in the method is to release the threader guide. Additionally, you have to pull the thread loop through the needle’s eye. Make sure to pull the thread on its side completely.
Pros
- With this method, you can quickly and efficiently do the task.
- It involves fewer steps, hence less time-consuming.
Cons
- Not every machine has an automatic need threader.
- Automatic needle threading machines are expensive.
The Bottom Line
Using an automatic needle threader, you can save time. If you have a poor vision, this method is more viable. However, if your unit is old, it might not have an automatic needle threader.
Tips for Using a Needle Threader on a Sewing Machine
We have curated some tips to make sure that you correctly understand how to use a needle threader on a sewing machine. Check out these tips below:
Don’t Use an Overly Thick Thread.
The little hook on our sewing machine’s needle threader might not be able to grab specific types of thread. We highly recommend you not to use a metallic thread, decorative thread, or transparent nylon thread.
Moreover, when using an automatic threader, refrain from using a thread with a thickness of 130 or more. Generally, such threads get stuck on the threader.
Change a Dull or Bent Hook
That small hook on your automatic threader that pulls the thread can get dull or bent over time. Sometimes, you can mend it with your fingernail to position it correctly. Eventually, you will need to replace such hooks.
Position the Needle Correctly
Ensure that your needle is in the highest position. Also, the presser foot should be lowered out so that the automatic needle threader can work. Turn the handwheel towards yourself till the needle raises to the highest position.
Many sewing machines come with a button. This button will automatically raise the needle for the sewster.
Refrain from Using a Damaged Needle
Over time, your needle can bend and get dull. We advise against using a damaged needle as it can affect your sewing project. Generally, the needles get dull when you are working on thick fabrics.
You may also come across a bent needle before inserting it into the sewing machine. Though it is not very common, it can happen at times. If you are using a damaged needle, the hook will not line itself.
It is why we suggest all sewsters keep a few extra needles.
Make Sure You’re Using the Correct Needle
Are you sure you are using the correct needle? Certain materials demand specific types of needles. For instance, when sewing through the knit fabric, you must use a ballpoint needle. A ballpoint needle won’t make the fabric snag or run.
However, if you are using an automatic needle threader, this might not be possible. Therefore, when you are using a different type of needle, use a typical needle threading tool. The best needle for an automatic threading tool is from size 11 to size 16.
Knot Your Thread
Once you have threaded your needle, make sure to tie a knot. Without the knot, the thread might slip out of the eye. Therefore, don’t forget to tie the knot on your thread.
Frequently Asked Questions
What direction should I thread the needle?
The thread will go from the front side of the needle to its backside. Please do not twist the thread while passing it through the needle’s eye. Use the thread from the top of the machine and not the bobbin thread at the bottom.
Are automatic needle threaders useful?
Yes. Automatical needle threaders do the job faster than the traditional needle threading tool. These units are convenient and do the job in less than a few seconds. If you have troubles with vision, these machines are a good option.
Can I make a needle threader by myself?
The good news is that you can make a needle threader by yourself. In case of an emergency, these DIY needle threaders feel like a savior. You can refer to many DIY tutorials and videos on the internet to make a needle threader.
Endnotes
Though the needle threaders are a small tool, they are convenient. Threading a needle isn’t an easy task. Finishing a sewing project can be challenging, especially when you are picking up years and your eyes are growing weak.
Whether you are using a threading aid or an automatic sewing machine threader, you have to follow specific steps. After all, the art of sewing is all about the tiny details!
We hope that our tutorial could help you learn “how to use a needle threader on a sewing machine.” We won’t keep you hanging with us anymore as you have to make some fantastic sewing projects!