How to use a Narrow Hemmer

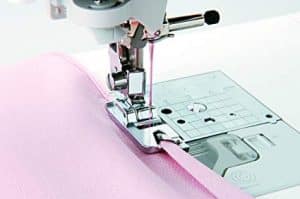
Table of Contents
Things to Note
Before we share tips for using a rolled hem presser foot, there are a few important things to note:
- This presser foot can be used with any type of fabric, including denim and chambray, suede, minky, and chenille, it’s best used with a sheer or lightweight material, such as a lightweight linen or knit.
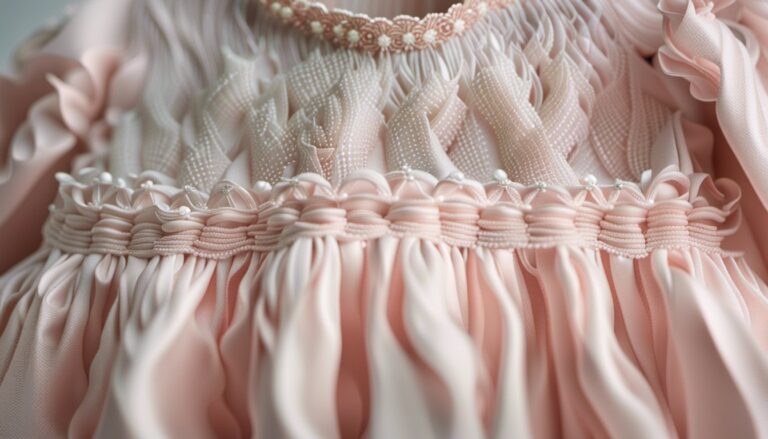
- A rolled hem presser foot works best with a straight hem, such as the finishing edges on a scarf or a shawl. While you could use it with a curved hem, it’s a lot more challenging and it does require a lot of practice.
- In order to get the results you desire, you really need to focus on feeding the fabric into the foot the right way, right from the beginning.
Now, let’s look at how you use a rolled hem presser foot.
Step 1
Cut a narrow strip of fusible interfacing between 1/8 inch and 1/16 inch wide by 1 to 2 inches long. Fuse the strip to edge of the material you are going to be working with.
Step 2
Using the width of the interfacing, fold the fabric over; fold over a second time, creating a equal width and pin it in place.
Step 3
Set a small piece of tissue paper underneath the presser foot. Set the pinned hem on top of the tissue paper and line up the folded edge of the rolled hem to the inner edge of the right leg of the presser foot. Gingerly pull the tails of the thread away from your sewing machine and slowly place 2 to 3 stitches into the hem, securing it in place.
Step 4
Take out the first pin, raise the presser foot, and then remove the second pin and feed the folded hem into the presser foot.
Step 5
Slowly stitch the hem in place while pulling the hem toward you. When you’re finished, just pull away the tissue paper and press the hem. Voila! You should have a beautiful rolled hem.
Image: