How to Sew a Sleeve Placket

 You have selected a handsome sewing pattern for a tailored, button down shirt. You’ve picked out the perfect sewing fabric – a knit material – and you can’t wait to get into your sewing room, rev up your sewing machine, and get to work. There’s just one problem, though; as you’re sewing, you come to the arms and you suddenly realize that you have to sew a sleeve placket!
Step 1
Find your placket pattern. If you’re using a standard commercial sewing pattern, the placket pattern should have come with it and it should be clearly marked; however, if it didn’t come with a pattern or you can’t locate it, you should be able to find a template that you can print out online.
Step 2
With the wrong side of the fabric facing you, set the placket pattern on top of the sleeve. Stitch out the box around the cutting line, and make sure that you pivot around the angles. It will be helpful to set a small stitch length on your sewing machine.
Step 3
Using a sharp pair of shears, cut the opening line into the shape of a V. Make sure that you cut the line so that it is situated close to the stitch line.
Step 4
Flip the sleeve over so that it is right side up and press the placket through the opening. Use an iron to press the opening.
Step 5
Fold the small side of the sleeve under the sleeve, right along the folding line and use an iron to press it.
Step
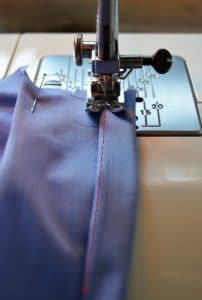
Slowly stitch along the folding line. Take care that you are placing your stitches so that they are situated right up against the folding line.
Step 7
Fold the other side of the opening so that it forms a point. Use an iron to press the point.
Step 8
Fold the sleeve along the two folding lines. Again, use an iron to press the folding lines.
Step 9
Position the pointed part of the placket over the smaller part of the placket. Stitch to enclose the raw edges so that they are positioned underneath the placket.
Step 10
Sew an edgestich along the placket, continuing the stitch about 2 cm more than the opening of the cuff to enclose the raw edges.