How to Easily Line a Jacket

KEY TAKEAWAY
- Adding a lining to a jacket can give it a more finished and professional look.
- The bagging method is a clever and simple technique for lining a jacket.
- Following the step-by-step instructions provided in this tutorial can help you successfully line your jacket.
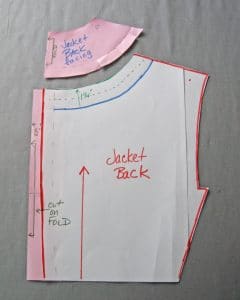
Step 1
Start by cutting out all of the pieces like you normally would. Use the instructions provided with your pattern to stitch the shell of the jacket, as well as the lining; however, when it comes time to attach the font facing to the lining, avoid sewing around 2 inches along the edge of the bottom. Stitch on the sewn edge of the lining to secure it to the seam allowance on the facing.
Step 2
Stitch the collar to the edge of the jacket’s neck.
Step 3
Position the jacket so that the right sides are facing, and the pin and stitch the shell of the jacket and the lining together along the neck and sides. Don’t sew the hem, though; leave it loose.
Step 4
Now it’s time to grade the seam allowance so that it fits the jacket; use a marking tool to make this step easier. Once you have completed the grading, you can go ahead and trim off any excess material from the points on the lapel and snip into the corners of the lapel.
Step 5
Next, you are going to understitch the facing from the hem of the jacket to the breakpoint (the point where the lapels of the jacket start turning outward).
Step 6
For this step, you need to align the hems of the lining and the shell. Stitch them together from one end to the other. This will create a bit of gapping in between the ends of the facing and the lining, which will serve as the pleat.
Step 7
Stitch the lining and the sleeve together.
Step 8
Fold the ends of the lining of the sleeve up around 2 inches and place the cuffed lining inside the sleeve, making sure to match the seams. Ensure that neither the jacket nor the lining are twisted and stitch them together. Repeat this step on the opposite side of the jacket.
Step 9
Cut a slit that measures about 8 to 12 inches under one of the arms. Turn the jacket and start pulling it through the slit until the jacket is in the right position.
Step 10
Stitch up the hole in the arm and there you have it! You’re jacket is lined! To finish the look, press the jacket and it will look as good as store-bought! Easy peasy!