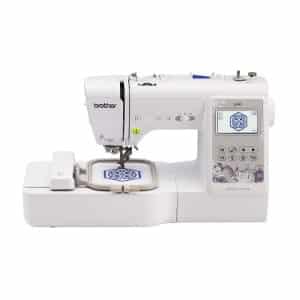
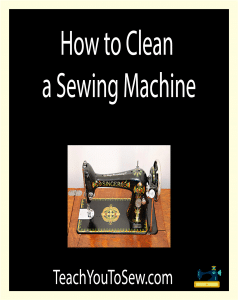
How to Clean a Sewing Machine

 Cleaning your sewing machine is more important than you may think. It’s the best way to ensure your machine continues you to serve you well over a long period of time.
After all, one of the most common issues that interferes with the smooth functioning of your machine is the lint – a by-product of sewing that you just wouldn’t be able to avoid.
The amount of lint your machine has to deal with depends on how often you use your machine, and the type of fabrics you use. For instance, the fabrics that “shed” a lot more than the others – such as velvet – would end up sifting more lint into your machine than other fabrics.
A short cleaning session from time to time may go a long way in getting rid of this lint and keep your machine running smoothly and efficiently. Not to mention, it would also allow your machine to function quietly, while most machines gradually get noisier as they get old.
Furthermore, regular cleaning can also often save you big bucks on major repairs, and reduce the trips you have to make to your dealer for more thorough cleaning, which too may have its cost add up over time.
Finally, before we walk you through the step-by-step process to clean your sewing machine, let us tell you that cleaning your sewing machine may not always turn out to be enough in terms of maintenance for your machine. You need to learn how to clean AND oil a sewing machine, which will help you take care of all the maintenance needs of your sewing machine perfectly.
So with that said, here’s how to clean sewing machine the right way.
You may find our Sewing Dictionary useful!
Table of Contents
Refer to the Instruction Manual
The first thing to do when cleaning your sewing machine is to find the instruction manual and carefully go through it. It’s important to be aware of some Do’s and Don’ts for your machine that you may otherwise not be able to find elsewhere.
If you don’t have the instruction manual of your machine, you can try to download it from the official instruction manuals page of the manufacturer’s website. Many of them have one where they allow downloading instruction manuals based on the model of your sewing machine.
If you’re trying to learn how to clean an old singer sewing machine that doesn’t has an instruction manual, you can head to this page and download one.
If you don’t manage to find the manual online, getting in touch with the manufacturer over the phone may help. Similarly, some local dealers, too, may help you get the information you’re looking for if you fail to find the manual using the other sources.
Get the Right Tools
You will need the following sewing tools:
- Your machine’s instruction manual.
- A nylon or lint brush to remove the lint and dust that may have accumulated in different parts of your sewing machine. If you haven’t cleaned your machine since a long time you may want to consider using canned air as it will be better-suited to get rid of large amounts of lint and dust. We like the OXO Good Grips Deep Clean Brush Set.
- New set of needles. It’s recommended to replace the needle every time you have a maintenance session for your machine
- A soft cloth (preferably muslin)
Basic Steps to Cleaning Your Sewing Machine
- Unplug your machine. This is very important, as keeping the machine plugged in while cleaning it can lead to getting an electric shock or other similar issues
- Figure out which side is the flat side of the needle, and push it in that direction to remove it. The flat side commonly faces the back of the machine, but in some different types of machines, such as the one with side-loading bobbins, it may be facing the right side of the machine.
- You then need to remove the pressure foot, bobbin, needle plate and bobbin case following the detailed instructions your machine’s manual has come with. Doing it without following the instruction manual may be beyond most sewers, including even the DIY-ers.
Removing the Race Area
While removing the race area may not be much challenging if you have a detailed instruction manual assisting you, putting it back on may turn out to be quite a task. Hence, you would want to make sure you know exctly how to put it back on properly before removing it.
If you’re not sure, simply don’t do it. It should ideally be left to a local dealer anyway.
Getting Rid of the Lint and Dust
Use the nylon brush to remove the lint and dust that may have got into parts of your machine like the area under the feed dogs as well as the race area (that is in the case you do end up removing the race area).
If you’re using canned air as a powerful alternative for the nylon or lint brush, make sure you’re careful with the way you blow the lint. You must blow it OUT of your machine, and not to the inside of it. Also, have at least a 4” distance between the nozzle and the parts you’re blowing, in order to prevent exposing them to moisture which may lead to corrosion.
Also, never use your breath for blowing the lint, as it contains even more moisture than canned air and can lead to a greater risk of corrosion.
Once you have performed these steps, you need to put the race area back into the machine before proceeding with the next steps.
The Next Steps
- Now clean the thread path by removing the side cover. If there’s no side cover, simply use the canned air to clean the thread paths by subjecting the nozzle at the top of the thread paths. This is one of the simpler ways to clean the tension discs.
- As far as cleaning the exterior of your machine is concerned, you can use a clean, dry and soft cloth for the task.
- Once you’re done with all the above steps, you need to try running the machine without any of the parts (except the race area) being put back on. If it runs smoothly, proceed to the final step below.
- Plug off the machine again, and put all the parts in place carefully. However, don’t insert the old needle; go for a new one instead.
A Word on Cleaning Vintage Sewing Machines
If you’re looking for useful information on how to clean a vintage sewing machine, the steps above may more or less work for it as well. However, you should be using an old toothbrush instead of a brush, and a damp microfiber cloth to get rid of as much dirt, grim and lint as possible.
Want to learn more about sewing machines? Check out our Best Sewing Machine Reviews.