Best Way to Sharpen Sewing Scissors

| Method | Pros | Cons |
|---|---|---|
| 1. Using a Sharpening Stone | – Professional finish – Adjustable sharpness – Polished blade finish |
– Expensive investment – Complicated method – Risk of injury |
| 2. Using a Rotary Tool | – Extremely sharp blade – Adjustable sharpness – Versatile tool |
– Risk of injury from debris – Requires skill and experience – Requires protective goggles |
| 3. Using Aluminum Foil | – Quick and easy – Requires minimal supplies – Suitable for slightly dull blades |
– Only effective for slightly dull blades |
| 4. Using Sandpaper | – Safe and inexpensive – Easy to follow – Efficient results |
– Only effective for slightly dull blades |
| 5. Using a Mason Jar | – Quick and safe method – Suitable for cutting tough materials – Available at home |
– Permanently damages the mason jar – Not suitable for other purposes |
Table of Contents
- 1 The Supplies You’ll Need
- 2 Different Methods for the best way to sharpen sewing scissors
- 2.1 Method 1 Best Way to Sharpen Sewing Scissors- Using A Sharpening Stone
- 2.2 Method 2 Best Way to Sharpen Sewing scissors- Using A Rotary Tool
- 2.3 Method 3 Best Way to Sharpen Sewing Scissors- Using Aluminum Foil
- 2.4 Method 4 Best Way to Sharpen Sewing Scissors- Using A Sandpaper
- 2.5 Method 5 Best Way to Sharpen Sewing Scissors- Using A Mason Jar
- 3 Frequently Asked Questions About the Best Way To Sharpen Sewing Scissors
- 4 Summing Up
How we decide on what to buy:
Our goal is to help you find the best sewing resource for your requirements. We’ll do the legwork to ensure you get the most for your money, whether you’re shopping for high-end gear or the bare essentials. We consult experts, friends, and family members who are also sewists, teachers, and/or craftspeople; we scour the Internet for information on how sewing supplies are used; we read customer reviews by real users; and, of course, we rely on our own accumulated expertise as sewists, teachers, and/or craftspeople.
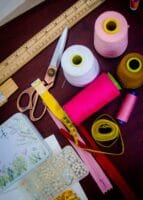
The Supplies You’ll Need
As we mentioned earlier, if you want to skip the opportunity to learn the best way to sharpen sewing scissors, you can buy a sharpener. However, when there are other inexpensive and fun methods to do so, why invest in a single-utility tool?
Best Way to Sharpen Sewing Scissors
Your Dull Scissors
Needless to say, the first thing you will need to sharpen a dull pair of scissors is that worn pair of scissors. You can sharpen a dull pair of scissors at just about any stage; it needn’t be in a state where it mauls the fabric. The sooner you sharpen your scissor, the better.
Sharpening Stone
Sharpening stones or whetstones are stones with a course surface on both sides. Good sharpening stones generally have one 400-grit surface and one 1,000-grit surface. Therefore, they can sharpen and polish a scissor or a knife at the same time.

Rotary Tool
Rotary tools are simple to use since they are small and handheld. Using one to sharpen sewing scissors requires some practice, but it is doable. This electric tool can be expensive, but just by changing the front attachment tool, a rotary tool is a handy equipment piece ideal for any person’s hardware and repair kit. Check Today's Price on Amazon

Aluminum Foil
Almost every kitchen has an aluminum foil roll or wrap. Without aluminum foil, most kitchen functions would be hampered. Therefore, this one is easy to procure, inexpensive, and easy to handle as well.
Sandpaper
 Sandpaper is another item that you might find in your house, especially if you’ve recently got some woodwork done in your home. Even if you do not find a stray piece lying around, they are pretty affordable. For our purpose, the sandpaper of anything between 150 and 200 grits should work. Check Today's Price on Amazon
Old Mason Jar
You can use an old mason jar you don’t quite care about to sharpen your sewing scissors. The only two things to ensure are that the jar should have a smooth and round surface. You will probably only use it to sharpen your scissors in the future.
Different Methods for the best way to sharpen sewing scissors
Now that you have an idea of the things you will need to sharpen your dull sewing scissors, you should be eager to start. After all, not only are the procedures inexpensive but we are only asking you to buy one of the five tools mentioned to bring your scissors back to life.
Some of these methods might seem wacky because of how simple, inexpensive, yet useful they are. Therefore, before you order the equipment from Amazon, read how you can produce each method and decide which one will work the best for you.
As a note of caution, we have to mention that sharpening your scissors and knives can be a risky and dangerous process. Owing to the fact that you’re actively going to sharpen something that might cut through your skin, you must be careful. Make sure you have proper safety equipment and a first aid kit around.
Now, without further delay, let us look at five of the best ways to sharpen your sewing scissors at home.
Method 1 Best Way to Sharpen Sewing Scissors- Using A Sharpening Stone
This is one of the more complicated processes on this list. However, the method will allow you to sharpen any knife and scissors to their full potential. Make sure you invest in the suitable sharpening stone that has surfaced of 400 and 1000 grits each.
Step 1
Test the sharpening angle since every blade has one. Look at the angle at which the scissor is tapering towards the end and follow the same angle to sharpen the scissor each time. Any conflict in the angles might make the material brittle and cause it to break while sharpening.
Step 2
Disconnect the two legs of the scissor with the help of a screwdriver. Doing so will give you comfortable access to the two blades. It is only when you have access to the entire blade that you can sharpen your scissors perfectly on a sharpening stone.
Step 3
Use either water or honing oil to wet the stone’s surface. Only a wet stone can safely sharpen a blade.
Step 4
Start by stroking the blade in one direction over the coarser side. Make sure that you apply slight downward pressure on the stone while maintaining the angle already existing on the blade. Depending on how dull your knife is, 10 to 15 strokes should do the trick.
Step 5
Check the inner edge of the blade for burrs. If you don’t see any, you can proceed to the next step. Otherwise, clear the burrs by carefully stroking the blade on the whetstone again.
Step 6
If the stone is adequately sharpened, stroke it on the wet finer side to make the blade shiny and finished. If you want your scissor to look even better, you can use an even finer whetstone to polish both the legs of the scissors.
Step 7
Fix both the legs of the scissors together to allow the scissor to be used to cut fabric.
Pros
- You can make your blade as sharp as you want.
- Get a professional finish.
- You get to choose how fine you want your blade’s finishing to be.
Cons
- Buying a whetstone can be an unnecessary expense.
- Complicated method.
- The method can get risky because of the sharpened blade and coarse surfaces.
Final Verdict
If you want to sharpen your sewing scissors professionally, there is no way better than the whetstone method. This is a professional-grade method that allows you to choose how sharp and polished you want your scissor to be.
Method 2 Best Way to Sharpen Sewing scissors- Using A Rotary Tool
A Dremel rotary tool is a very versatile and widely used electric product that allows you to do a lot of things. All you have to do is change the front accessory tools to do whatever function you want to do with it. A rotary tool can be used with an abrasive stone that is used to sharpen knives.
Step 1
Look which cutting edge of the blade is beveled. Face that side up and clamp the blade into a vise. Then, disjoint the legs to make sure that the scissor’s blades are very accessible.
Step 2
Add a grinding stone tool made of aluminum oxide to the front edge of the tool. Make the collet nut securely tight to make sure there are no accidents due to the high-speed rotary tool.
Step 3
Hold the rotary tool very tightly and turn on the motor. Turn the abrasive stone attachment slowly towards the beveled edge of the blade. Press the tool lightly to make it hone the blade.
Step 4
Hold the tool at the exact same angle as the blade to avoid breaking the scissor. Keep the tool moving up and down the blade at all times while maintaining the pre-existing angle. You will run the risk of grinding a hole in the blade if you stop at any spot for even a second.
Step 5
You will have to keep passing the rotary tool’s abrasive stone eight to ten times across the stone. This much should be enough to sharpen the blade.
Step 6
Check the blade for burrs. In case you can spot some, run the tool against the blade multiple times to clear those burrs. Repeat all the steps on the second side of the blade.
Step 7
Attach the two ends once you are satisfied with the result.
Pros
- The method will make your blade extremely sharp.
- You get to choose how sharp you want your blade to be.
- You can use different attachments to make the rotary tool function in different ways.
Cons
- The method might get risky due to the debris flying while sharpening the blade. Always wear protective goggles when operating the dremel tool.
- It would be best if you were extremely skilled, or you can ruin the blade or hurt yourself.
Final Verdict
If you have prior experience with a rotary tool, this method is an ideal choice for you since it allows you autonomy over how much you want to sharpen your blade. The results are professional; however, that is the skill set you will need to avoid injuries or damage.
Method 3 Best Way to Sharpen Sewing Scissors- Using Aluminum Foil
With the professional-grade and complicated methods out of the picture, all the other methods are extremely simple. With simple supplies and a simple method, you can get a comfortably sharp sewing scissor blade in no time.
Step 1
Tear off a 12-inch-long piece of aluminum foil from the roll and flatten it out completely.
Step 2
Fold the aluminum foil at least six times. The foil should become as thick as possible to make the honing successful.
Step 3
Cut at least eleven slices of the foil. Make sure you utilize only full-stroke cuts to make the method successful. Halfstrokes will only hone half the blade, making the scissor uneven.
Step 4
Check whether or not the method has worked by cutting a piece of scrap paper on the side. In case you can still feel dullness on the blade, cut a few more pieces of the blade.
Step 5
Brush or wipe off all the extra aluminum that might have settled on the blade, and you’re good to go!
Pros
- It hardly takes any time.
- Sharpens dull blades in no time.
Cons
- This method will only hone scissors that are slightly dull.
Final Verdict
If you need emergency fixing and have some aluminum foil lying around in your kitchen, there is no method better than this one. Cutting aluminum foil is fun and easy and will get you the results quickly.
Method 4 Best Way to Sharpen Sewing Scissors- Using A Sandpaper
Using sandpaper to hone a dull blade is very similar to using aluminum foil for the process. Make sure you have sandpaper that is between 150 and 200 grits for the best results. All you have to do is use full-bodies strokes to slice sandpaper, and you’re good to go.
Step 1
Take a piece of 150 to 200 grit sandpaper and fold in its halves in such a manner that both sides have abrasive surfaces facing out.
Step 2
Use your dull scissors to cut small strips off the folded sandpaper. Only make full-bodies cutting strokes. Otherwise, you will end up with an unevenly sharpened blade.
Step 3
Make sure you can feel the grits active as small abrasive stone on the surface. This will mean that the process is working,
Step 4
Cut some scrap paper and see if the process has worked. In case you need more sharpening, cut a few more full-bodies slices off the sandpaper to make the blade sharper.
Pros
- Incredibly safe process
- Inexpensive
- Easy to follow
- Works efficiently
Cons
- The method will only hone slightly dull blades
Final Verdict
Using sandpaper to hone a blade is one of the best ways to sharpen your sewing scissors. This method is so powerful that it can make your scissor feel razor-sharp in no time.
Method 5 Best Way to Sharpen Sewing Scissors- Using A Mason Jar
Mason jars can be used for more than one purpose. They can be used to hone your scissor’s blades.
Step 1
Open your scissors and place the legs on each side of the mason jar’s body.
Step 2
Try to cut through the jar with your scissors. Move your dull scissors outwards in an effort to close them. In simple words, run the bladed with inwards pressure on the surface of the mason jar.
Step 3
Repeat the above step as many times as you want. The glass shards on the surface will hone the blade. Therefore, the older the jar the better.
Pros
- A quick fix available at each home.
- Safe and effective method.
- Hones your scissor’s blades enough to cut leather and denim.
Cons
- The method will permanently scratch and ruin your mason jar.
Final Verdict
Honing your scissors’ blades against a mason jar is one of the safest methods you can adopt. This method will act as a quick fix. However, the jar you use will be permanently scratched, and you might not be able to use it for other purposes in the future.
Frequently Asked Questions About the Best Way To Sharpen Sewing Scissors
We have five extremely simple methods listed for you to make a decision regarding how you want to sharpen your dull sewing scissor. However, if you still have questions regarding the best way to sharpen sewing scissors, don’t worry; we’ve got you covered in this section.
Can I cut through something else to hone my sewing scissor’s blades?
Yes, you can also cut through thick cardboard or steel wool ball to sharpen your sewing scissor’s blades. The trick is to make sure that you run the blades evenly on any surface that can provide abrasion.
Should I invest in a scissor sharpener?
If you are particular about how sharp your sewing scissors’ blades are, you will figure out of they are getting dull as soon as there’s an issue. When your blade has only dulled a little bit, you can cut through several surfaces to fix the issue. Therefore, there is no need to invest in a sharpener.
However, if you realize that your blade has dulled only after it’s too late, investing in a sharpener is a better option than indulging in sharpening through risky methods.
How do I know if my scissors have become dull?
If you feel difficulty in cutting through hard surfaces and if your scissors are grabbing or pulling and grabbing fabric, you can be sure that the blade has dulled. In case the blade is too dull, you can also visibly tell the difference.
Summing Up
Sewing is an art form that requires not only your skill and understanding but also the perfect tools and equipment. All of us can feel the irritation that comes with dull kitchen knives; however, feeling a pair of sewing scissors getting dull requires extreme awareness. Regardless, dull scissors will make it particularly difficult for you to cut through fabric and continue with your work.
We have listed five of the best ways to sharpen sewing scissors, from the simplest to the most advanced. Have fun…but remember safety first!